Ingredients
– 2 cups sweet cherries
– 2 ½ tablespoons chia seeds
– 2 tablespoons maple syrup
Instructions
1-Step 1: Prepare Your Cherries Begin by gathering your ingredients and equipment. You’ll need a medium saucepan, potato masher or fork, glass jars with lids, and your three simple ingredients. Speaking of simple homemade staples, this jam pairs wonderfully with fresh nut butter on morning toast! Rinse your fresh sweet cherries under cool running water. Sort through them carefully, removing any damaged or overripe fruit. The quality of your cherries directly impacts the final flavor of your jam, so take a moment to select the best ones. Next, remove the stems and pit each cherry. You can use a dedicated cherry pitter for this task, which makes quick work of the process. If you don’t have one, simply slice each cherry in half with a paring knife and pop out the pit. This step takes about 10-15 minutes depending on your technique and quantity, so put on some music or a podcast and settle in for this meditative prep work.
2-Step 2: Cook and Soften the Cherries Place your prepared cherries in a medium saucepan. Turn the heat to medium and cook the cherries for 5-6 minutes. You’ll notice they start to release their juices and soften considerably. Stir occasionally to prevent sticking and ensure even heating. During this cooking time, the cherries will shrink slightly as their moisture releases and the natural sugars begin to concentrate. The kitchen will fill with a wonderful cherry aroma that signals the magic happening in your pan. According to Healthline, cherries are packed with antioxidants and anti-inflammatory compounds, making this jam as nutritious as it is delicious.
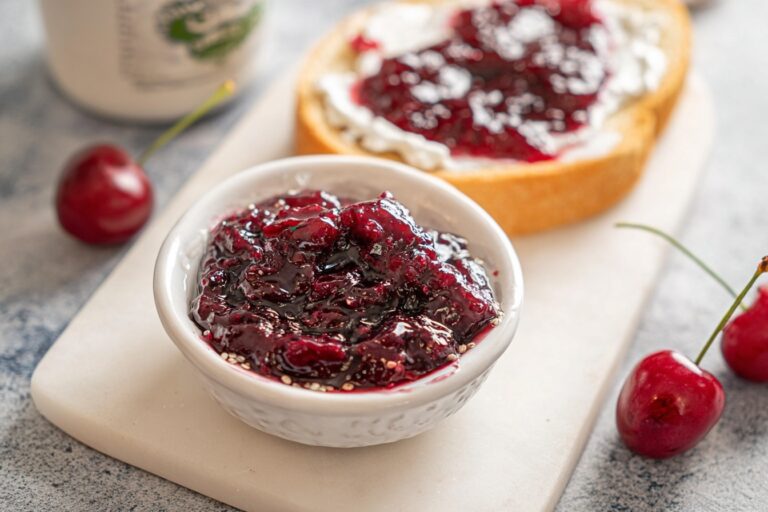
3-Step 3: Mash for Your Desired Consistency Once the cherries have softened, remove the pot from the heat temporarily. Using a potato masher, press down on the cooked cherries to break them up. How much you mash depends entirely on your personal preference:* For a chunky, rustic jam, give them just a few presses to break up the larger pieces while leaving plenty of texture.* For a smoother consistency, mash more thoroughly until the cherries break down into a near-puree.* For completely smooth jam, transfer the mixture to a blender and pulse until you reach your desired texture. Return the pot to the stove after mashing.
4-Step 4: Add Chia Seeds and Sweetener With your cherries mashed to your liking, add the 2 ½ tablespoons of chia seeds and 2 tablespoons of maple syrup to the pot. Stir everything together thoroughly to ensure the chia seeds distribute evenly throughout the fruit mixture. The chia seeds will immediately begin absorbing the cherry juices, starting the thickening process right before your eyes. Keep stirring for about a minute to prevent the seeds from clumping together. The mixture might seem too thin at this point, but trust the process and the seeds will do their work!
5-Step 5: Cool and Store Your Homemade Jam Remove the pot from the heat and let the mixture sit for a few minutes. During this time, the chia seeds continue absorbing liquid and creating that signature gel consistency that makes this jam so special. While the jam cools slightly, prepare your glass jars. Clean them thoroughly with hot, soapy water and dry them completely. Using clean jars prevents contamination and extends the shelf life of your jam. Pour the warm jam into your prepared glass jars, leaving about half an inch of headspace at the top. Wipe any drips from the rims and seal with clean lids. Allow the jars to cool completely on your counter before transferring them to the refrigerator.
6-Step 6: Let It Set Once cooled, refrigerate your jam for at least 2 hours before serving. This resting time allows the chia seeds to fully gel and the flavors to develop. The jam will thicken considerably as it chills, transforming from a loose fruit mixture into a perfectly spreadable consistency. Your Chia Cherry Jam is now ready to enjoy! Spread it on toast, swirl it into yogurt, top your oatmeal, or enjoy it straight from the jar with a spoon.
Last Step:
Please leave a rating and comment letting us know how you liked this recipe! This helps our business to thrive and continue providing free, high-quality recipes for you.Notes
🌰 Chia seeds absorb liquid to create a natural gel – no pectin required for perfect jam texture.
🍒 Fresh cherries shine brightest, but frozen work great too (no pitting needed).
❄️ Store in fridge up to 7 days or freeze for 3 months; thaw overnight in fridge.
- Prep Time: 15 minutes
- Chilling: 2 hours
- Cook Time: 7 minutes
- Category: Breakfast
- Method: Stovetop
- Cuisine: American
- Diet: Vegan
Nutrition
- Serving Size: 1 tablespoon
- Calories: 42 kcal
- Sugar: 5g
- Sodium: 0mg
- Fat: 1g
- Saturated Fat: 0g
- Unsaturated Fat: 1g
- Trans Fat: 0g
- Carbohydrates: 8g
- Fiber: 1g
- Protein: 1g
- Cholesterol: 0mg