Ingredients
– 1 cup graham cracker crumbs
– 2 tablespoons granulated sugar
– 6 tablespoons unsalted butter, melted
– 1 8-ounce package cream cheese, softened
– 1/2 cup sugar
– 2 teaspoons lemon zest, divided
– 2 tablespoons freshly squeezed lemon juice
– 1/3 cup heavy whipping cream
– 1/4 teaspoon vanilla extract
– Fresh fruit or fruit preserves for garnish
Instructions
1-First Step: Make the graham cracker crust Start by mixing 1 cup graham cracker crumbs, 2 tablespoons granulated sugar, and 6 tablespoons melted unsalted butter in a medium bowl. Stir until the mixture looks like damp sand and every crumb is coated. This is what helps the crust hold together once chilled. Divide the crust mixture evenly among 24 mini tart shells, mini muffin cups, or small dessert cups. Press it down firmly with the back of a spoon or your fingers so the base feels compact. A tight crust helps the tarts slice or pop out more easily later.
2-Second Step: Chill the shells Place the crusts in the refrigerator for about 15 to 20 minutes while you make the filling. This short chill gives the butter time to firm up, which helps the shells stay crisp and sturdy. If you are making these ahead for a party, you can chill the crusts longer too. That is handy for busy parents, students, or anyone getting ready for a gathering.
3-Third Step: Beat the cream cheese mixture In a large bowl, beat 1 package softened cream cheese and 1/2 cup sugar until the mixture looks smooth and creamy. Scrape the bowl once or twice so everything mixes evenly. This step matters because a smooth base gives you a better final texture. Add 1 teaspoon lemon zest, 2 tablespoons freshly squeezed lemon juice, and 1/4 teaspoon vanilla extract. Mix again until the filling tastes bright and well blended. If you like a stronger lemon flavor, you can add a little more zest later as garnish.
4-Fourth Step: Whip in the cream Pour in 1/3 cup heavy whipping cream and beat until the filling becomes lighter and fluffier. The cream gives these cheesecake tarts that soft, creamy finish people love in mini cheesecakes. Keep mixing just until the texture looks smooth and spreadable. If you are using a hand mixer, start on low speed so the filling does not splash. Then move to medium speed until the mixture thickens a bit. This helps keep your kitchen clean and makes the process easier for beginners.
5-Fifth Step: Fill the tart shells Spoon or pipe the lemon cheesecake filling into the chilled crusts. A piping bag gives a neat look, but a small spoon works just fine too. Fill each shell to the top, then smooth the surface if needed. For a more polished finish, use an offset spatula or the back of a spoon to make small swirls on top. Those little swirls catch the garnish nicely later.
6-Sixth Step: Chill until set Refrigerate the filled tarts for at least 2 hours, or until the filling feels firm enough to hold its shape. If you have extra time, 4 hours is even better. This chilling step is what turns the soft filling into a clean, sliceable dessert. Do not rush this part. A good chill gives the best texture and keeps the filling from sliding around when served.
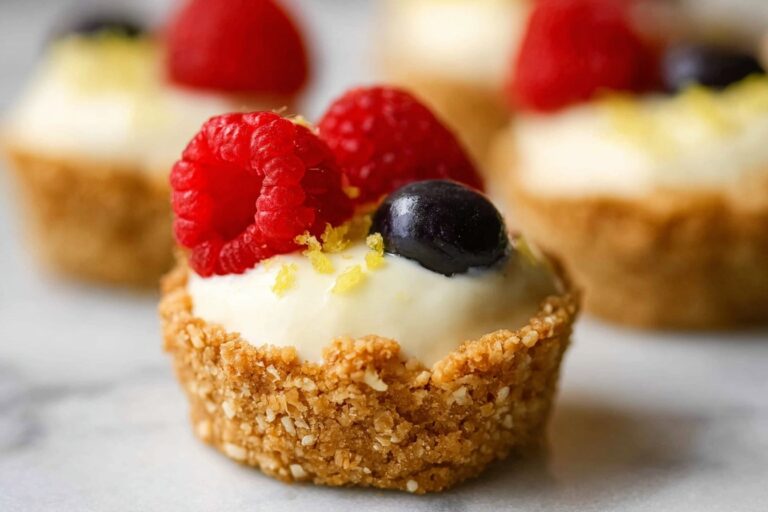
7-Final Step: Add the garnish and serve Just before serving, top each tart with fresh fruit or fruit preserves and the remaining 1 teaspoon lemon zest. Berries, raspberry preserves, blueberry compote, or strawberry slices all taste great with the lemon filling. Serve cold for the freshest flavor. If you want a little extra charm for a party tray, place the tarts on a white platter and add a few lemon slices or mint leaves around them. They look adorable and taste even better.
Last Step:
Please leave a rating and comment letting us know how you liked this recipe! This helps our business to thrive and continue providing free, high-quality recipes for you.Notes
🍋 Freshly squeeze lemons for zest and juice – intensifies bright, authentic citrus flavor.
❄️ Chill tarts at least 4 hours (overnight best) for perfect creamy set.
🎨 Garnish with berries, lemon slices, or preserves for colorful, professional presentation.
- Prep Time: 20 minutes
- Chill: 4 hours
- Cook Time: 10 minutes
- Category: Desserts
- Method: Baking
- Cuisine: American
- Diet: Vegetarian
Nutrition
- Serving Size: 1 tart
- Calories: 140 kcal
- Sugar: 9g
- Sodium: 110mg
- Fat: 10g
- Saturated Fat: 6g
- Unsaturated Fat: 3.5g
- Trans Fat: 0.2g
- Carbohydrates: 12g
- Fiber: 0.3g
- Protein: 2g
- Cholesterol: 30mg