Ingredients
– 1 Tbsp low-sodium soy sauce (adds a savory base for the coating)
– 1 large egg (acts as a binder in the coating mixture)
– 1/2 cup cornstarch (about 60 g) (provides the crunch factor when frying)
– 1 lb boneless, skinless chicken breast or thigh, cut into bite-sized pieces (about 450 g) (main protein)
– 3 Tbsp olive oil, divided (about 45 ml) (used for frying)
– 1 Tbsp freshly grated ginger (about 15 g) (brings a spicy warmth)
– 2 large garlic cloves, grated (about 1 tsp) (adds a fragrant punch)
– zest of 1 large lemon (about 1 tsp) (infuses bright citrus note)
– 1/4 cup lemon juice (about 60 ml) (provides acidity)
– 2 Tbsp honey (about 30 ml) (delivers natural sweetness)
– 2 Tbsp low-sodium soy sauce (about 30 ml) (adds umami)
– 1 1/2 Tbsp rice-wine vinegar (about 22 ml) (gives subtle tang)
– 1/4 tsp crushed red-chili flakes (kicks up the heat)
– thinly sliced scallions (green tops only) (garnish)
– toasted sesame seeds (sprinkled on top for nutty finish)
Instructions
First Step: Gather your ingredients and prep everything for smooth cooking. Start by zesting the lemon and grating the ginger and garlic to have them ready this mise en place makes the process faster. For gluten-free options, swap soy sauce with tamari right from the start to avoid last-minute changes.
Second Step: Make the sauce by whisking together the lemon zest, lemon juice, honey, soy sauce, rice-wine vinegar, and chili flakes in a small bowl. Set it aside so the flavors can mingle while you move on. If you’re making a low-sodium version, use less soy sauce here to keep it light for diet-conscious eaters.
Third Step: Prepare the chicken coating in a shallow bowl by whisking the soy sauce with the egg. Toss the bite-sized chicken pieces in this wet mixture, then coat them with cornstarch using the wet-hand/dry-hand method to stay clean. This step works well for beginners and can be adapted by using a gluten-free cornstarch substitute if needed.
Fourth Step: Heat 2 Tbsp of olive oil in a large non-stick skillet over medium-high heat. Cook the coated chicken in batches for 3-5 minutes per side until it’s golden-brown and crispy watch the time to prevent drying out, especially if you’re using chicken breast for a leaner option.
Fifth Step: Once the chicken is done, transfer it to a plate and keep it warm. In the same pan, add the remaining 1 Tbsp of oil and sauté the garlic and ginger for 30-60 seconds until fragrant. For a vegan twist, you could use vegetables like broccoli here instead of chicken.
Sixth Step: Pour in the prepared honey-lemon sauce and stir to combine, letting it simmer briefly. Return the chicken to the pan and toss everything quickly for 1-2 minutes until the sauce thickens and coats the pieces nicely. If you’re feeding kids, reduce the chili flakes for a milder taste.
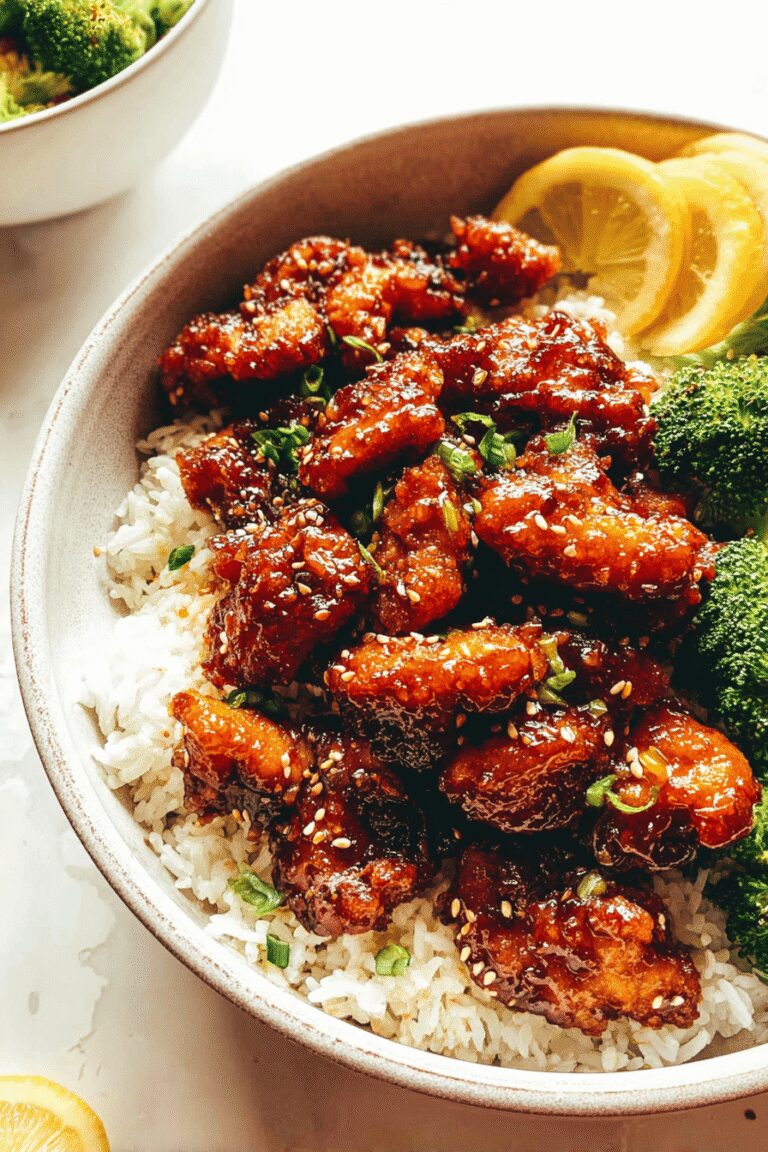
Final Step: Spoon the sticky honey lemon chicken onto plates, garnish with thinly sliced scallions and toasted sesame seeds, and serve right away. It pairs great with steamed rice or sautéed vegetables, and for meal prep, store extras as we’ll cover later. This step ensures your easy chicken dinner looks as good as it tastes, with adaptations for different preferences making it versatile for the whole family.
Last Step:
Please leave a rating and comment letting us know how you liked this recipe! This helps our business to thrive and continue providing free, high-quality recipes for you.Notes
👩🍳 Use the wet‑hand/dry‑hand method to keep your fingers clean while coating the chicken in cornstarch.
🔶 The sauce may appear thin at first; it will rapidly thicken once it contacts the hot chicken.
🍯 Adjust the sweetness by adding a little more honey or reducing it, depending on your taste.
- Prep Time: 15 minutes
- Cook Time: 25 minutes
- Category: Main Dish
- Method: Stir‑Fry
- Cuisine: Asian
- Diet: High Protein
Nutrition
- Serving Size: 1 cup (≈ 150 g)
- Calories: 277
- Sugar: 10.5 g
- Sodium: 225 mg
- Fat: 10.5 g
- Saturated Fat: 1.5 g
- Carbohydrates: 15 g
- Fiber: 0.5 g
- Protein: 25 g
- Cholesterol: 47 mg