Ingredients
– 1 package (530 grams) Mint creme sandwich cookies crushed for the cookie soil layer
– 1 box (93 grams) White chocolate instant pudding mix base for the creamy pudding
– 2 cups (480 ml) Half and half or whole milk mixes with pudding for smooth texture
– 6 to 8 drops Green gel food coloring adds the eerie green color
– 8 ounces (227 grams) Thawed whipped topping folds in for a light, airy fill
Instructions
1-Gathering what you need is the first step for Zombie Dirt Pudding Cups. Start by pulling together the mint creme sandwich cookies, white chocolate instant pudding mix, milk, green food coloring, and whipped topping. Use clear cups sized 5 to 9 ounces to show off the layers, and get ready for about 1 hour and 15 minutes total time.
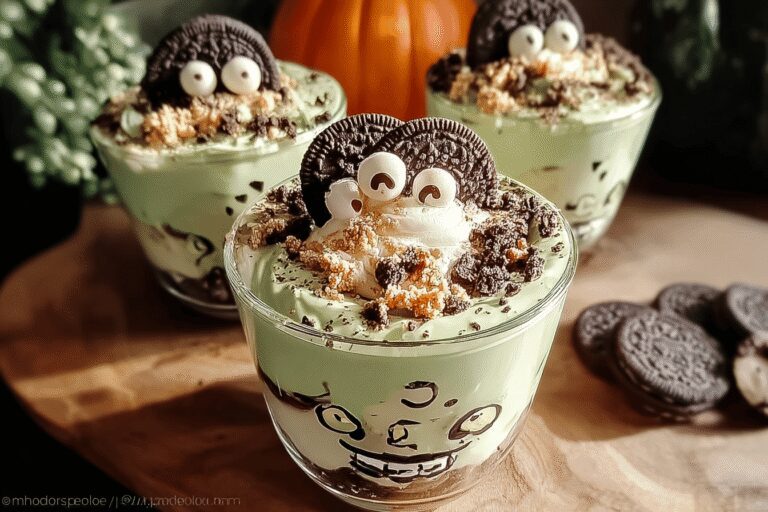
2-Next, separate the cookie halves with filling from the rest. Crush the remaining cookies and the separated halves without filling into fine crumbs, which will form your “dirt” base. This step adds that fun texture kids and adults love in Zombie Dirt Pudding Cups.
3-Whisk the Pudding Mixture Whisk the white chocolate instant pudding mix with the milk and 6 to 8 drops of green gel food coloring for 1-2 minutes. Let it sit for 5 minutes to thicken, then gently fold in the thawed whipped topping. This creates the creamy, green layer that makes these cups so spooky and delicious.
4-Now it’s time to layer everything. In your clear cups, alternate the cookie crumbs and pudding, starting and ending with crumbs for a neat look. This method helps the flavors blend just right in Zombie Dirt Pudding Cups.
5-Chill and Decorate Chill the assembled cups for 1 hour to set. After that, press large and small candy eyeballs into the exposed cookie filling halves to make zombie faces on top. Add optional garnishes like bone, skeleton, or Halloween-themed sprinkles for extra flair. Keep in mind to explore similar no-bake treats for more ideas that fit your next gathering.
6-For the final touches, serve these chilled Zombie Dirt Pudding Cups and watch them disappear. They’re a great way to get creative in the kitchen, and you can adapt them based on what you have on hand.
Last Step:
Please leave a rating and comment letting us know how you liked this recipe! This helps our business to thrive and continue providing free, high-quality recipes for you.Notes
🎨 Use gel food coloring for vibrant green without thinning the pudding.
🍪 Crush cookies finely for better texture and layering.
👁️ Add candy eyeballs last to prevent melting or fading in the fridge.
- Prep Time: 15 minutes
- Chill Time: 1 hour
- Category: Dessert
- Method: No-bake assembly
- Cuisine: American
- Diet: Vegetarian
Nutrition
- Serving Size: 1 cup