Ingredients
Proteins like chicken Adds heartiness and protein to dishes, forming the base for nourishing meals.
Proteins like beef Provides rich flavor and substantial texture, ideal for stews and roasts.
Proteins like pork Offers a tender, juicy element that works well in slow-cooked recipes.
Vegetables such as onions Brings sweetness and depth, enhancing the overall taste profile.
Vegetables such as carrots Contributes natural sweetness and vitamins, promoting a balanced dish.
Vegetables such as potatoes Adds bulk and carbohydrates, making meals more filling and versatile.
Seasoning herbs and spices Infuses layers of flavor, allowing for customization based on preferences.
A liquid like broth Helps in moistening and tenderizing ingredients during cooking.
A liquid like water Serves as a simple base for building sauces and keeping dishes hydrated.
plant-based substitutes like tofu or lentils in place of proteins such as chicken, beef, or pork to maintain a hearty feel without animal products.
naturally gluten-free vegetables like carrots and potatoes, and ensure any added herbs or spices are from gluten-free sources for safe preparation.
lighter options such as more vegetables like onions over heavier proteins, and use water instead of broth to cut down on calories while preserving nutrition.
Instructions
1-First Step: Preheat Your Dutch Oven Start by preheating your Dutch oven on the stovetop over medium heat to ensure even cooking. This step helps in browning proteins like chicken or beef effectively, locking in flavors from the outset. For best results, preheat for about 5 minutes, adapting for different dietary needs by using plant-based alternatives if needed.
2-Second Step: Brown the Chosen Protein Once preheated, add your protein such as beef or pork to the Dutch oven and cook until it’s nicely browned on all sides. This process, taking around 10 minutes, builds a flavorful base for your dish. If you’re making it low-calorie, choose leaner cuts and monitor the heat to avoid overcooking, keeping the focus on Dutch ovens’ efficiency.
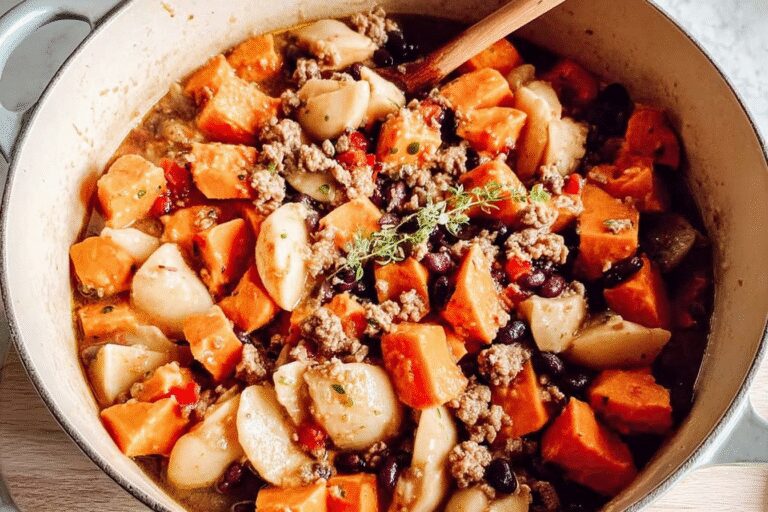
3-Third Step: Add Vegetables and Seasonings After browning, incorporate vegetables like onions, carrots, and potatoes into the pot for a colorful mix. Stir in seasoning herbs and spices at this点, allowing them to release their aromas over low heat for about 5 minutes. This step enhances versatility, letting you tweak for gluten-free options by selecting appropriate veggies, all while highlighting why Dutch ovens excel in home cooking.
4-Fourth Step: Pour in Liquid and Cover Next, add a liquid like broth or water to the mixture, ensuring it covers the ingredients partially for optimal braising. Cover the Dutch oven and reduce heat to low, letting everything simmer for one to several hours depending on the recipe. This slow-cooking method preserves nutritional benefits, making it easy to adapt for busy parents or students with minimal hands-on time.
5-Fifth Step: Check and Stir Occasionally During cooking, check the pot every 30 minutes to stir and ensure even heat distribution, which helps avoid sticking and maintains flavors. If you’re preparing for dietary substitutions, this is a good time to adjust seasonings for preferences like vegan options. Cooking times vary, but aim for tenderness, showcasing the advantages of Dutch ovens in creating balanced meals.
6-Final Step: Serve and Enjoy Once done, remove from heat and let it rest for a few minutes before serving to allow flavors to meld. Dish out portions that offer a mix of protein, carbs, and fats for a nutritious meal, perfect for food enthusiasts. For an extra touch, pair with simple sides, ensuring your Dutch oven creation brings joy to any occasion, from family dinners to celebrations.
Last Step:
Please leave a rating and comment letting us know how you liked this recipe! This helps our business to thrive and continue providing free, high-quality recipes for you.Notes
🛠️ Season your cast iron Dutch oven properly before first use to maintain a non-stick surface.
🔥 Avoid sudden temperature changes to prevent cracking or warping.
🍲 Use Dutch ovens for slow cooking to develop rich flavors in your dishes.
- Prep Time: 15-30 minutes
- Cook Time: 1-3+ hours
- Category: Cooking Guide
- Method: Slow Cooking