Ingredients
– 1 cup lukewarm water
– 2 teaspoons active dry yeast
– 1/2 teaspoon sugar
– 3 cups all-purpose flour, divided
– 1 to 2 teaspoons kosher salt
– 2 tablespoons extra virgin olive oil, plus more for coating the bowl
Instructions
1-Step 1: Make the Sponge Start by activating your yeast to ensure it’s alive and ready to work. In a large mixing bowl, combine the 1 cup lukewarm water, 2 teaspoons active dry yeast, and 1/2 teaspoon sugar. Stir gently until the yeast and sugar dissolve completely. Add 1/2 cup of your flour and whisk until smooth this mixture is called a “sponge” and gives the yeast a head start. Place the bowl uncovered in a warm spot in your kitchen. A sunny windowsill or near a warm oven works beautifully. Let it sit for about 15 minutes until the mixture becomes frothy and bubbly on top. This frothiness tells you the yeast is active and ready to leaven your bread.
2-Step 2: Form the Pita Dough Once your sponge is bubbly and fragrant, it’s time to build the dough. Add 1 to 2 teaspoons kosher salt and 2 tablespoons extra virgin olive oil to the bowl. Then gradually add almost all of the remaining flour, holding back about 1/2 cup for dusting and adjusting the dough consistency. Stir with a wooden spoon or sturdy spatula until a shaggy, messy mass forms. Don’t worry about it looking pretty at this stage that comes next! Dust your hands with some of the reserved flour and knead the dough right inside the bowl for about a minute to bring everything together.
3-Step 3: Knead the Dough Lightly dust a clean countertop or large cutting board with flour. Turn the dough out onto the surface and begin kneading. Push the dough away from you with the heel of your hand, fold it back over itself, give it a quarter turn, and repeat. Knead steadily for about 2 minutes until the dough becomes smoother and more cohesive. Cover the dough with a clean kitchen towel and let it rest for 10 minutes. This rest period relaxes the gluten and makes the next round of kneading easier. After resting, knead the dough for another couple of minutes. The finished dough should feel smooth, elastic, and moist but not sticky. If it sticks to your hands, add flour one tablespoon at a time. If it feels dry and stiff, sprinkle in a little water. Proper dough consistency is crucial for pitas that puff.
4-Step 4: Let the Dough Rise Find a clean mixing bowl and lightly coat the inside with olive oil. Place your kneaded dough inside and turn it over once or twice to coat all surfaces with oil. This prevents a dry skin from forming on the dough as it rises. Cover the bowl tightly with plastic wrap, then place a clean kitchen towel on top for extra insulation. Find a warm, draft-free spot in your kitchen near a warm stove or in a slightly warmed oven (turn it off first!) works wonderfully. Let the dough rise for about 1 hour or until doubled in size.
5-Step 5: Divide the Dough Once your dough has puffed up beautifully, gently deflate it by pressing your fist into the center. Turn it out onto a clean, lightly floured surface. Using a bench scraper or sharp knife, divide the dough into 7 to 8 equal pieces. Shape each piece into a smooth ball by tucking the edges underneath and rolling gently between your cupped palms. Cover the balls with a clean towel and let them rest for 10 minutes. This short rest relaxes the gluten so the pitas will roll out easily without springing back.
6-Step 6: Shape the Pitas Now comes the fun part shaping your pita rounds! Work with one ball at a time, keeping the others covered so they don’t dry out. On a lightly floured surface, use a floured rolling pin to roll each ball into an 8-9 inch circle about 1/4 inch thick. Here’s the key technique: lift and turn the dough frequently as you roll. This prevents sticking and ensures even thickness throughout. If the dough springs back and won’t hold its shape, cover it and let it rest for another 5 minutes before continuing. Stack your rolled pitas on a lightly floured surface, separating them with parchment paper or a light dusting of flour to prevent sticking.
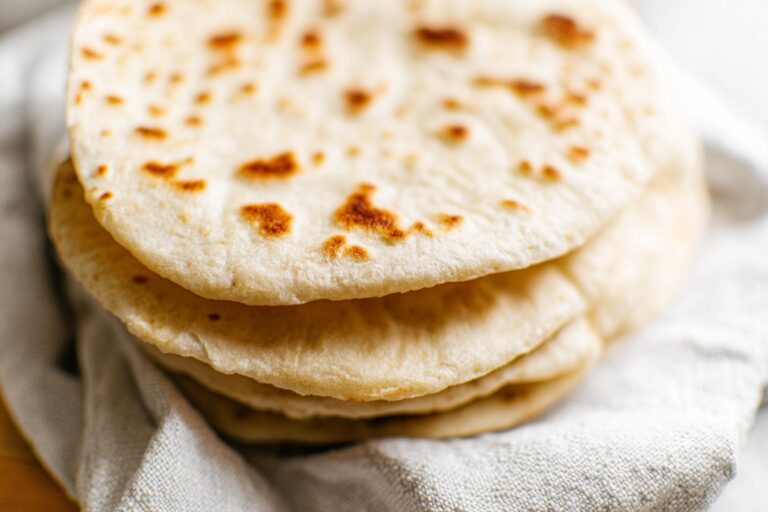
7-Step 7: Bake Your Pitas You have two excellent cooking methods to choose from oven baking or stovetop cooking. Both produce delicious results, so pick the one that suits your setup and schedule. Oven Method: Preheat your oven to 475°F with a heavy baking pan or cast iron skillet inside. Heating the pan while the oven preheats creates the intense bottom heat needed for puffing. Once hot, carefully place 2-3 pitas on the preheated pan and bake for 2 minutes on the first side, then flip and bake for 1 more minute. The pitas should puff up dramatically and develop light golden spots. Transfer baked pitas to a plate and immediately cover with a clean kitchen towel. This traps steam and keeps them soft and pliable. Stovetop Method: Heat a cast iron skillet over medium-high heat until a drop of water sizzles immediately. Lightly oil the surface and wipe away excess with a paper towel. Cook pitas one at a time: place a pita in the pan and cook for about 30 seconds until bubbles begin forming. Flip and cook for 1-2 minutes until the bottom develops toasted spots. Flip once more and cook 1-2 minutes more the pita should puff up like a balloon when it’s ready. Cover each cooked pita with a clean towel while you finish the rest. If a pita doesn’t fully puff, press down gently with a clean towel while it finishes cooking.
Last Step:
Please leave a rating and comment letting us know how you liked this recipe! This helps our business to thrive and continue providing free, high-quality recipes for you.Notes
🌡️ Get oven or skillet screaming hot for epic puffing pockets.
🙌 Knead minimally for soft, airy texture – overdo it and it toughens.
❄️ Freeze baked pitas up to 3 months; thaw and reheat for fresh taste.
- Prep Time: 30 minutes
- Rising: 1 hour 10 minutes
- Cook Time: 3 minutes
- Category: Bread
- Method: Bake
- Cuisine: Mediterranean
- Diet: Vegetarian
Nutrition
- Serving Size: 1 pita
- Calories: 220 kcal
- Sugar: 1g
- Sodium: 300mg
- Fat: 5g
- Saturated Fat: 1g
- Unsaturated Fat: 4g
- Trans Fat: 0g
- Carbohydrates: 38g
- Fiber: 2g
- Protein: 6g
- Cholesterol: 0mg